Diver iOS App, version 3.5.2; How To
iPad App
Figure 1. The iOS Diver app on the iPad; tap the Diver icon to launch the app.
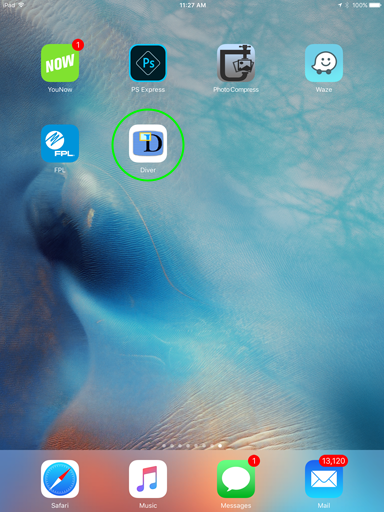
Figure 2. After the app launches the Diver login screen appears.* Enter your login email & password and tap the LOGIN button.
Tap the "browse Diver anonymously" (circled in blue below) link to enter Diver without logging in (anonymous users can browse dives, but only logged in users can create new clips).
Diver login is by invitation only, email joro@stanford.edu to request an invite code. Once you've obtained an invite code tap the register link (circled in green below) and fill in the signup form to complete registration. After registering you'll be automatically signed in to your account and will have full access to the app. A password will be emailed to you.
*If you've previously logged in you'll automatically be taken to the browse view (figure 3) immediately after the app launches without having to log-in again.
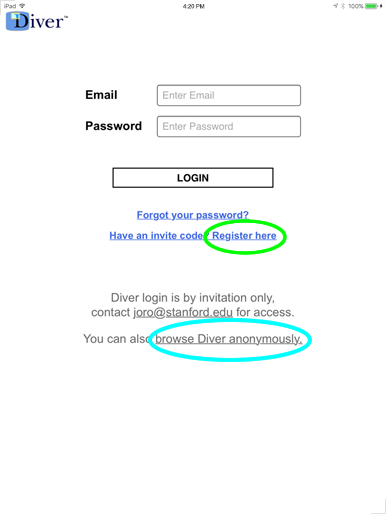
Figure 3. After logging into (or anonymously entering) Diver, the "Browse Dives" view opens showing a list of all saved dives with the newest to oldest clips in descending order.
When logged in* tabs appear (circled in green below) at the top of the browse list. Tap the "My Stuff" tab to filter by only your dive clips, or tap "Everyone" to see everyone's dive clips.
Search (figure 4) or scroll, and then tap any of the thumbnails to go to the "Diver Player" view (figures 11, 18-20) and watch the dive clip.
*Tabs are visible to logged in users only. When browsing anonymously all dive clip filtering automatically defaults to "Everyone".
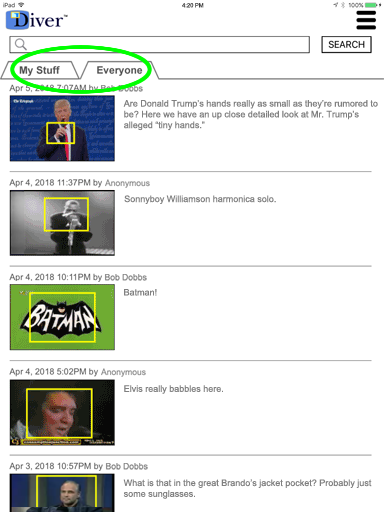
Figure 4. In addition to the "My Stuff" and "Everyone" tabs (figure 3) you can also search/filter the entire collection of saved dive clips by entering a #hashtag keyword, e.g. search for all dive clips with the tag #PresidentTrump included in the comment.
Tap the CLEAR link (circled in green, below the search button) to clear the search and start over.
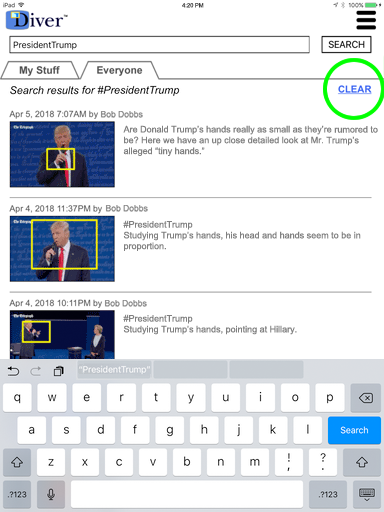
Figure 5. Tap the menu icon at the top of the screen to open the main menu.
Tap any of the menu items to initiate the specified action or navigate to another view; or tap the icon again to close the menu.
e.g. To pick new videos to load into Diver, tap "My Videos" or "YouTube" in the main menu — you can choose your own videos (see figures 6-7) or any publicly available and copyright-free video on YouTube (see figures 8-10).
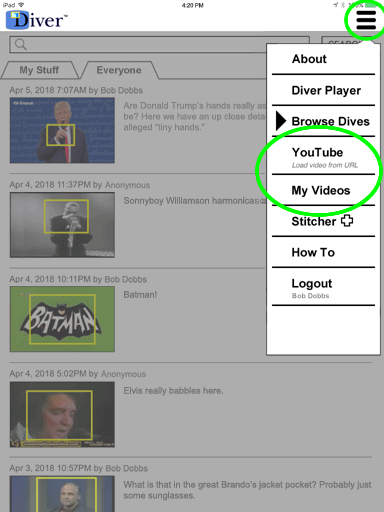
Figure 6. Tap "My Videos" from the main menu (figure 5) to pick from any video already in your iPad's camera roll.
Select one of your videos (e.g. circled in green below) to load into Diver, or tap "Cancel" (circled in red) to go back.
Note: Videos shot in portrait mode will be stretched to fit for landscape in Diver.
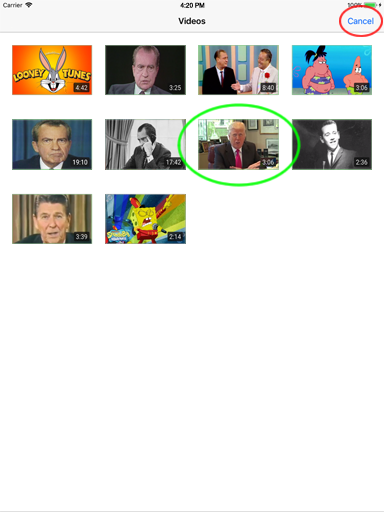
Figure 7. After picking (figure 6) use the iPad's built in editor (circled in green) to select a portion* of your video to import into Diver.
Tap the play button (circled in purple below) to preview your selection. Tap "Use" (circled in red) to load the selection into Diver, or tap "Videos" (circled in blue) to pick another video.
*Imported videos can be a maximum of 4 minutes long.
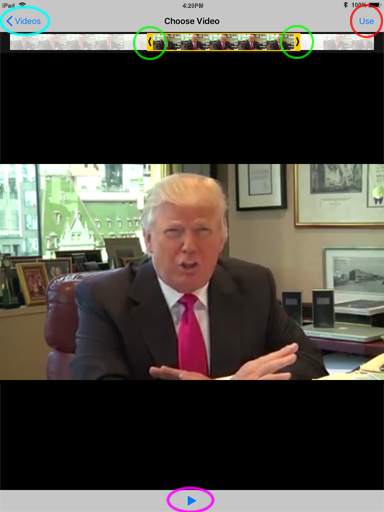
Figure 8. In addition to picking from your own videos (figures 6-7) you can also choose any publicly available and copyright-free video on YouTube* (see figures 9-10).
Tap "YouTube" in the main menu (figure 5) to browse YouTube videos.
After the YouTube page opens tap the magnifying glass (circled in green at the top of the YouTube page) to search for and pick a YouTube video to load into Diver.
*Only academic and/or research users can directly access YouTube videos from within Diver.
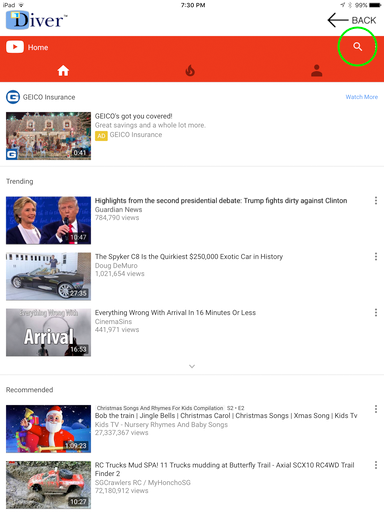
Figure 9. After choosing a YouTube video tap the share icon (circled in purple  below). Copy the video's URL and tap the ←BACK button (at the top of the app, circled in green) to go back to Diver's main screen.
Tip: If you tap the ←BACK button without copying a link, the URL of the YouTube video you're currently viewing automatically fills Diver's Load Video popup (figure 10).
below). Copy the video's URL and tap the ←BACK button (at the top of the app, circled in green) to go back to Diver's main screen.
Tip: If you tap the ←BACK button without copying a link, the URL of the YouTube video you're currently viewing automatically fills Diver's Load Video popup (figure 10).
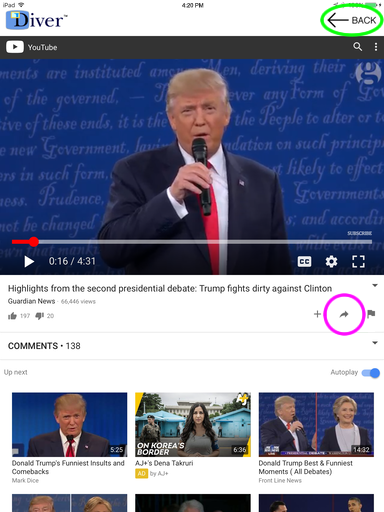
Figure 10. If a YouTube video link/URL was successfully copied (see figure 9) then the "Load YouTube video" popup automatically appears. Tap the LOAD button to load the video in Diver.
Note: You can also copy a YouTube URL (e.g. https://youtu.be/lNdG6iE4a84) or just a YouTube video's ID (e.g. lNdG6iE4a84) from any source, choose "Load video from URL" from the main Diver menu and paste (or type) the URL/ID.
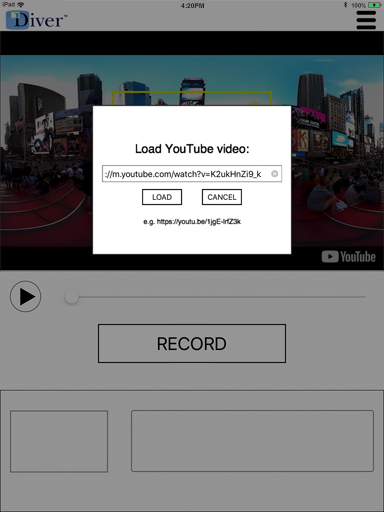
Figure 11. Tap the LOAD button (figure 10) in the the Load YouTube video popup, or tap "Use" (see "My Videos", figure 7) to load the video in Diver.
Tap the play button (circled in green below) to play the video.
Tap the step-buttons (circled in blue) to precisely step the video forward or backward in 1/8th second increments; or press & hold the step-buttons to more rapidly step through the video.
Time-code (circled in blue above the step buttons) is displayed (as both current playback time and total duration) to e.g. help precisely position the video before tapping RECORD (figure 12).
Note: While a (YouTube) video's paused YouTube sometimes displays related video links and watch & share icons; these YouTube features (circled in red) are disabled in Diver. Tap the close "X" (circled in purple below) to hide the related video links.
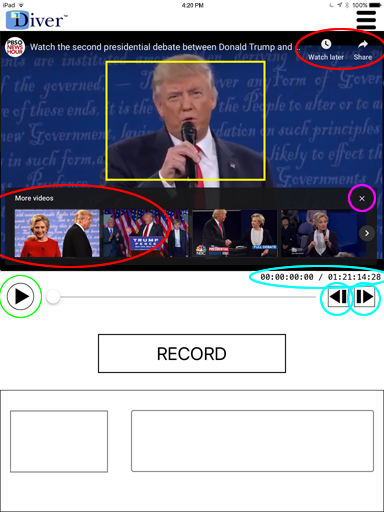
Figure 12. Tap the RECORD button to make a temporal/spatial dive clip. If paused the video begins playing. The button blinks red to indicate recording is in progress. Drag or resize the guided-noticing rectangle (see figures 13-16), all of the rectangle's motion is saved as part of the clip recording. Tap RECORD again to stop the recording.
Note: Maximum dive clip RECORD time is 90 seconds; minimum dive clip RECORD time is 1 seconds.
No diving is allowed on "My Videos" selections longer than 4 minutes (see figure 7), or YouTube videos greater than 2.5 hours in duration.
No diving is allowed on "My Videos" selections longer than 4 minutes (see figure 7), or YouTube videos greater than 2.5 hours in duration.
How to use the Guided-Noticing Rectangle
Drag, resize, and zoom Diver's "guided-noticing" rectangle. Note that that all finger taps/presses inside the guided-noticing rectangle temporarily display a transparent yellow square (to resize), double squares (to zoom), or a circle (to drag) under your finger indicating where to tap/press to initiate the desired action. Figure 13. Drag to move Drag the guided-noticing rectangle from the center to change its position.
Drag, resize, and zoom Diver's "guided-noticing" rectangle. Note that that all finger taps/presses inside the guided-noticing rectangle temporarily display a transparent yellow square (to resize), double squares (to zoom), or a circle (to drag) under your finger indicating where to tap/press to initiate the desired action. Figure 13. Drag to move Drag the guided-noticing rectangle from the center to change its position.
Figure 14. Resize from corner Drag diagonally from any corner of the guided-noticing rectangle to resize.
Figure 15. Pinch to zoom Pinch with two fingers inside the guided-noticing rectangle to shrink or enlarge.
Figure 16. Default size/position Double-tap to return the guided-noticing rectangle to default position and size.
Figure 17. After making a dive with RECORD type your comments (up to 256 characters*) and tap the SAVE button to save the clip, or tap the CANCEL button to discard the clip and start over.
Note: Adding a keyword preceded by a hashtag (e.g. #PresidentTrump) anywhere in a comment makes the dive searchable (see figure 4).
*By limiting to only a few words comments can appear as large(r) font headlines in the text area of the rendered dive clips (see figures 25-27).
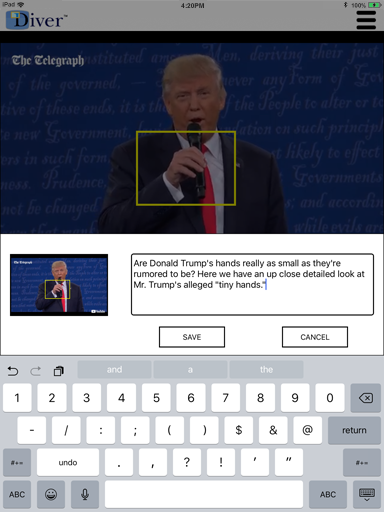
Figure 18. Tap the video thumbnail (circled in green below) to playback your recording. Dive recordings will automatically stop playing at the end of the clip. At any time tap the thumbnail again (or tap the play/pause button or move the video slider) to stop the dive clip from playback.
During RECORD playback the dive clip's in & out points are indicated by markers (circled in red below) on the time slider.
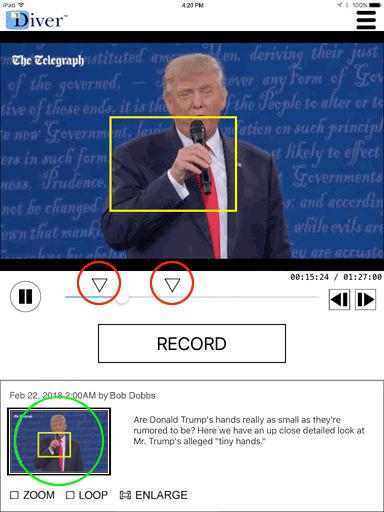
Figure 19. For dive clips made with RECORD you can play back only the panned/zoomed area that's inside the guided-noticing rectangle's path (called "Free‑D"™) by checking the ZOOM checkbox (circled in red) below the thumbnail (note that the checkbox is only visible during RECORD playback).
You can also play dive clips made with RECORD in a continuous loop by checking the LOOP checkbox (also only visible during RECORD playback).
Tap the (circled in green) ENLARGE icon (during RECORD playback) to go from portrait to landcape mode and play dive clip videos at fullscreen (see figure 20).
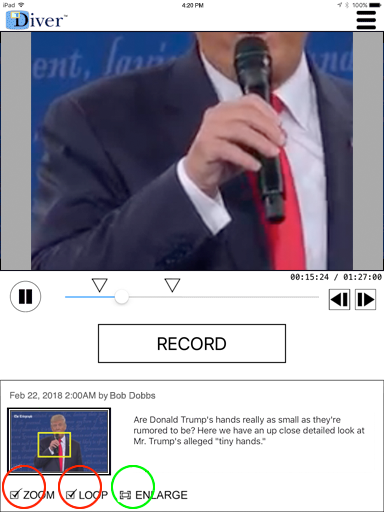
Figure 20. After tapping the ENLARGE icon (figure 19) the app changes from portrait to landscape and the video plays fullscreen.
If the ZOOM icon (figure 19) was selected before tapping ENLARGE only the video that's inside the guided-noticing rectangle plays fullscreen ("Free‑D"™). Otherwise the entire frame plays fullscreen with the guided-noticing rectangle floating on top of the video.
Tap the close/X icon (circled in green) at the top corner of the screen to exit fullscreen and return to portrait mode. If LOOP (figure 19) was not checked the app automatically exits fullscreen when the dive clip ends.
Note: The Diver app ignores the iPad's automatic tilt detection and always rotates the video 90 degrees CCW when in fullscreen playback mode regardless of the device's orientation, portrait or landscape. Hence (manually) turn your iPad to landscape/horizontal view while watching fullscreen video.
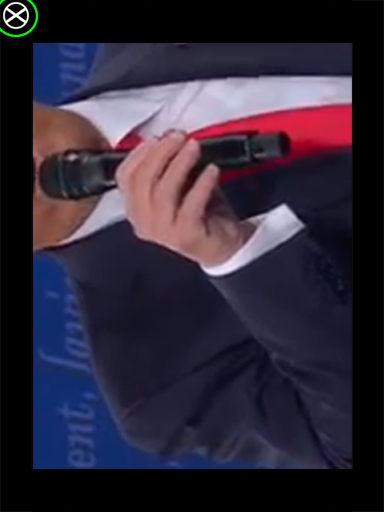
Figure 21. After saving a dive clip it can take up to a few minutes to finish processing, longer if a) you picked your own video with "My Videos" (see figures 6-7), or b) it's the first time a dive's been made from a particular YouTube video and c) the YouTube video's lengthy (greater than e.g. 30 minutes in duration).
The dive processing takes place remotely and won't slow down, block, or otherwise adversely affect performance of the app. You can playback the dive clip (see figure 18) while it's still processing, however the RENDER icon (figures 25-27) won't appear and you won't be able to e.g. share the dive clip (figure 29) until the processing completes.
While the dive finishes processing its thumbnail icon will indicate "IMAGE PROCESSING" (and with videos picked from "My Videos" — indicate "VIDEO UPLOADING" or "VIDEO TRANSCODING") in the Diver Browse view (as circled in the screen capture below).
Note: While dive clips are uploading & transcoding the "My Videos" menu item (figure 5) will be disabled– i.e. you can only upload/transcode one video at a time from your iPad.
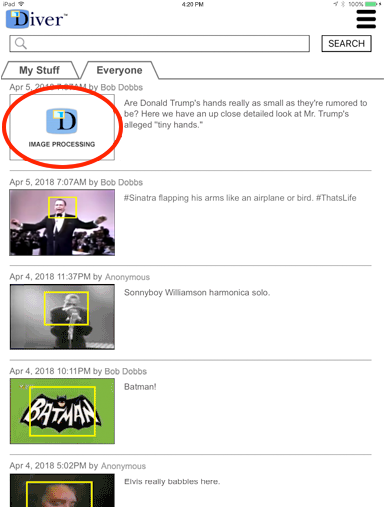
Figure 22. To check if the dive clip's finished processing, refresh the Browse view.
Scroll to the top of the view and then pull straight down. Make certain you pull all the way down from the very top of the Browse view until both activity spinners (circled in green below) appear, then let go. The Browse view automatically springs back into position and refreshes.
If the dive clip has completed processing the thumbnail will change from "IMAGE PROCESSING" to a still image of the start frame from your dive (circled in red below).
Note: As dive clips are processed the thumbnail image will change to indicate status (uploading, transcoding, etc.). When complete the final thumbnail will in most instances automatically display without manually refreshing the view.
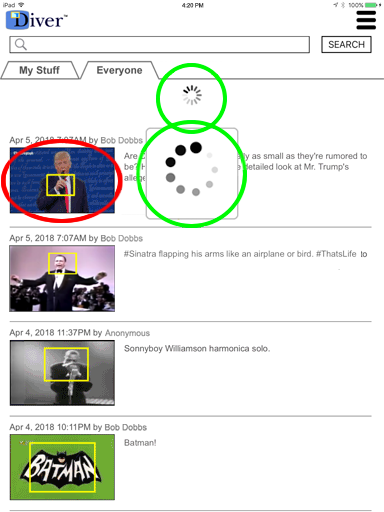
Figure 23. If you previously created & saved a dive clip you can delete, edit, trim, or render it at any time after processing completes (see figures 21-22)*. You can only delete, edit, trim, or render the clips you own; you can't perform these functions on someone else's clips.
Tap DELETE to permanently remove the dive clip. Tap EDIT to edit the dive clip's comment.
Note: The DELETE, EDIT, TRIM, and RENDER icons (circled in red below) are replaced with the ZOOM, LOOP, and ENLARGE icons (figure 19) while the dive clip is playing. When the dive clip stops playing, DELETE, EDIT, TRIM and RENDER will appear again.
*The DELETE, EDIT, TRIM, and RENDER icons aren't displayed until after "My Videos" upload & transcode complete.

Figure 24. Dive clip TRIM
Tap the TRIM icon to open the dive clip trim editor.
Tap the left-side step buttons (circled in green below) to trim the dive clip's IN-time in 1/8 second increments, or tap the right-side step buttons (circled in blue) to trim the dive clip's OUT-time. Press & hold the step-buttons to more rapidly step through and trim the video.
Alternatively, you can drag the marker triangles above the slider to change the IN/OUT times. The time-code indicators help to more precisely trim the dive clip.
Tap the SAVE button to save the trimmed clip, or tap CANCEL to revert the changes and close the dive clip trim editor.
Note: Dive clips are limited to a minimum 2 seconds and a maximum 90 seconds.
Pro Tip: Double-tap a triangle marker to reset to the saved IN or OUT time. If the markers overlap or are too close together to select & drag, tap a step button or tripple-tap a marker to toggle the markers front to back.
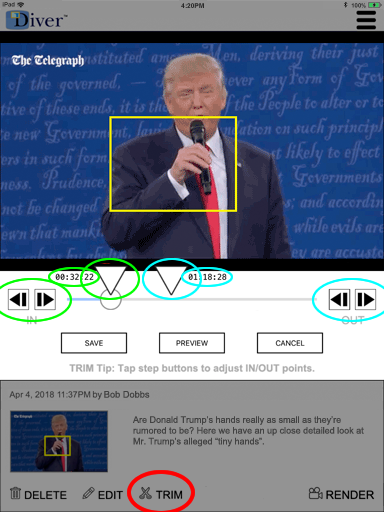
Figure 25. Dive clip RENDER
Rendered dive clips are self contained video files that can play anywhere even without the Diver app.
Tap the RENDER icon, the dive clip render popup opens.
Tap the RENDER button in the popup (circled in green below) to place the dive clip into the rendering cue, or tap CANCEL to exit without rendering.
Rendering can take several minutes to complete, you'll receive a notification (and email) with links when the video's ready.
Note: You can only render the dives you own, you can't render someone else's clips. Additionally, if the dive clip was created prior to Diver version 1.3.0 the render function will not be available.
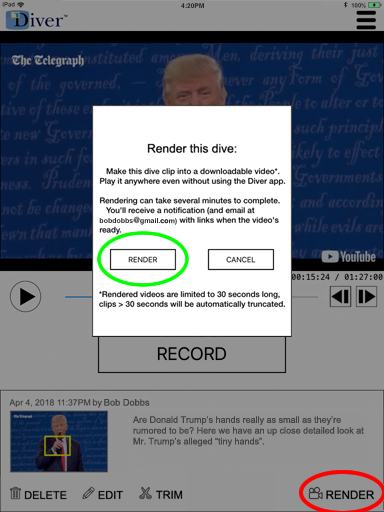
Figure 26. RENDER, Playback
After the dive clip render completes* a check mark appears next to the RENDER icon (circled in red below), tap to play the rendered dive clip video.
Tap the share icon (circled in purple) to copy** the rendered dive clip's URL to your iPad's pasteboard; you can then paste & share the link on e.g. Twitter or Facebook (see figure 29), send it in an email or text, open and play the clip in a web browser, etc.
Tap the download icon (circled in blue) to save** the rendered dive clip video to your iPad's camera roll.
To exit the rendered dive clip playback and return to the main Diver player screen tap the close/X icon (circled in green).
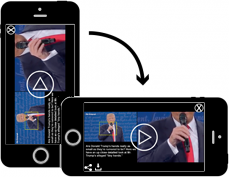
Note that rendered dive clips play fullscreen in landscape mode. The Diver app does not automatically detect orientation, instead manually rotate the iPad.
*Completed renders are accessible by everyone and not just the dive clip's owner.
**In app version >=3.3.x both the download and share link offer the option of selecting video in either a 2-up (576x242) or square (600x600) format (see figure 27).
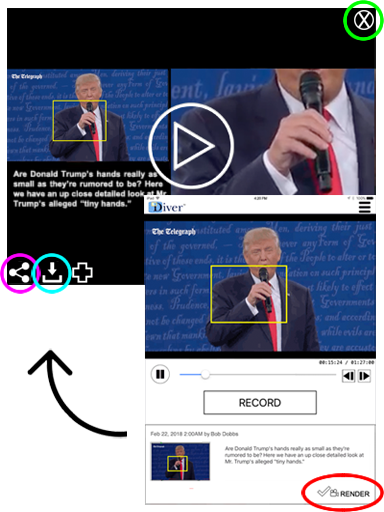
Figure 27. RENDER, Download & Share
Some dive clips rendered with app version >=3.3.x will include the option to download and share videos in two different formats:
1) 2-up; 576 wide X 242 high with both the guided noticing rectangle (on the left) and the zoomed portion of the video (on the right).
2) zoomed; 600X600 square video format, i.e. just the zoomed area form inside the guided-noticing rectangle.
If the square (600X600) format video's available a popup will appear when tapping the download or share (figure 26) icons. Tap the the 2-up icon (circled in purple below) to download or share the 576X242 video, or tap the zoomed icon (circled in blue) to download or share the 600X600 video.
Videos download as self contained MP4 files, playable anywhere even without the Diver app. All files are saved to the iPad's camera roll.
Shares link to web pages (see figure 29) where users can play rendered dive clips in a browser without downloading videos or installing the app.
Note: If the square (600X600) format’s unavailable download (and share) will automatically default to 2-up (576X242) video.
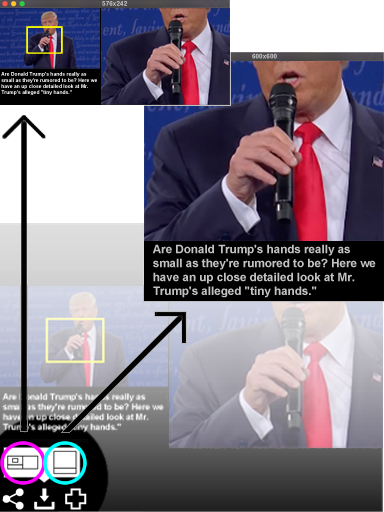
Figure 28. Dive clip Stitcher
Stitch (combine) up to 4 rendered dive clips (figures 25-27) into a single downloadable video.
Tap the RENDER or check ( ) icon to open the rendered dive clip player (see figure 26). Tap plus (
 ) next to the download and share icons to add the clip.
Once you start adding clips the "Stitcher" menu (figure 5) item becomes active, tap it to open the dive clip stitch popup.
Drag a thumbnail atop any square to change the order in which clips are stitched. Drag a thumbnail anywhere outside the popup to remove a clip from the stitch list.
Tap the STITCH button to stitch the clips. Stitching can take several minutes to complete, you'll receive a notification (and email) with links when the video's ready.
) next to the download and share icons to add the clip.
Once you start adding clips the "Stitcher" menu (figure 5) item becomes active, tap it to open the dive clip stitch popup.
Drag a thumbnail atop any square to change the order in which clips are stitched. Drag a thumbnail anywhere outside the popup to remove a clip from the stitch list.
Tap the STITCH button to stitch the clips. Stitching can take several minutes to complete, you'll receive a notification (and email) with links when the video's ready.
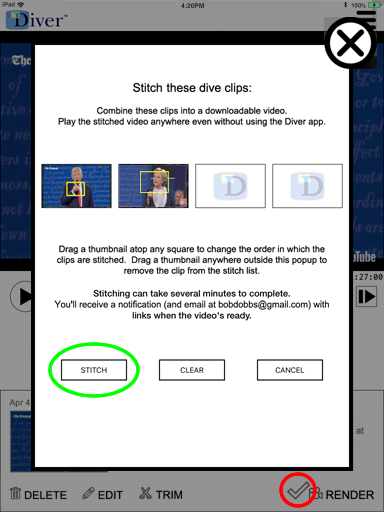
Figure 29. Share via social apps or the web...
Sharing a rendered dive URL (figures 26-27) on e.g. Facebook or Twitter automatically populates the post or tweet with a link to the dive. Tapping the post opens the dive clip in a web browser (e.g. Safari).
Tap the play button to play the video in your web browser (e.g. Safari). If Diver is installed on the iPad tapping the "open in app" link (at the top of the web page) automatically opens the dive clip in the Diver app.
An example dive clip shared on a) Facebook; and b) in Safari:
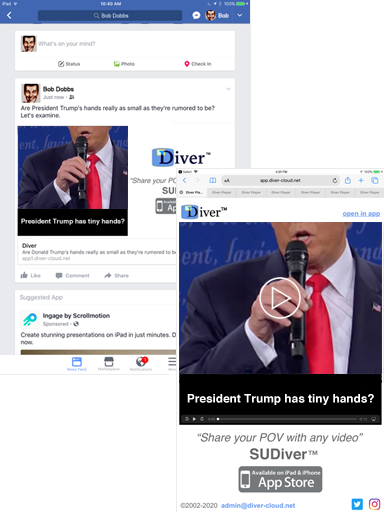
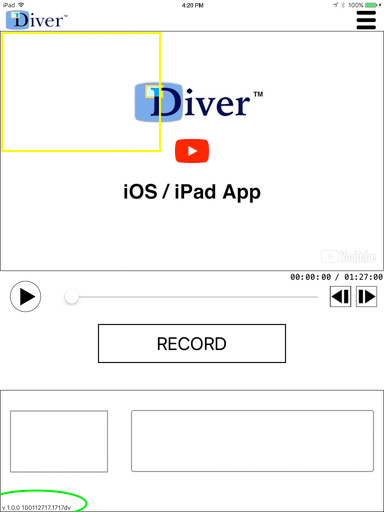
Figure 30. To view the current version # for the Diver app (e.g. "v 3.5.2 35221022201957") go to the "Diver Player" view and tap in the extreme lower left corner directly below (and to the left of) the comment box, the version # will appear (circled in green below). Tap the lower corner again to hide* the version #.
*After approximately 10 seconds and if not tapped again the version # will automatically disappear.
Note: On the iPhone version of the app tap the Diver logo in the top left corner of the Browse view (figure 31) to toggle the version #.
iPhone App
Diver is a "Universal" iOS app, the same App Store download can be launched natively on either iPad or iPhone.
Figure 31. iPhone Browse view...
If you've previously logged into Diver on the iPhone launching the app opens it in Browse view (see below), otherwise the app opens with the login screen (see figure 2).
The iPhone's Browse view displays a list all available dive clips (see figures 3-4).
Tapping a thumbnail (e.g. circled in red below) opens that dive clip in the iPhone player (see figure 32).
*YouTube videos (see figures 8-10) are currently unavailable on the iPhone version of the Diver app.
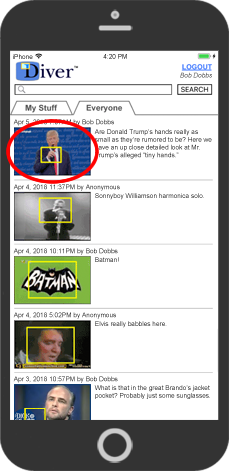
Figure 32. iPhone Player view...
After tapping a thumbnail (figure 31) the dive clip opens in the Diver player view.
Most features from the iPad version are also available on the iPhone*, e.g. play an existing clip (see figure 18), RECORD a new dive clip (see figure 12), etc.
Tap the ←BACK button (at the top of the app, circled in green) to go back to Diver's browse view.
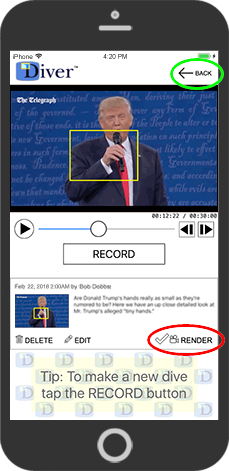 Tap the RENDER icon (circled in red) to render the dive clip (see figure 25) or play an already rendered clip (figure 26).
Note that rendered dive clips play fullscreen in landscape mode. The Diver app does not automatically detect orientation, instead manually rotate the phone.
Tap the RENDER icon (circled in red) to render the dive clip (see figure 25) or play an already rendered clip (figure 26).
Note that rendered dive clips play fullscreen in landscape mode. The Diver app does not automatically detect orientation, instead manually rotate the phone.
Build # 35221022201957; © 2002-2026